Tuesday, September 17, 2024

Update About My Blog...

Lack of New Posts

Yes, there has been a lack of new posts here on my blog.

I realize that. It needs to be changed.

I spent A LOT of TIME and EFFORT on two specific posts. You can read them here and here.

I also wrote a couple of lengthy posts about my new Sea Sucker Talon bike rack that I bought from REI. You can read those posts here and here.

Yes, there are a couple of recent posts that are INCOMPLETE. I need to circle-back and finish those posts.

For example, I started a post about my recent experience with a pig butchering scam. I am anticipating that the post will be quite lengthy.

I also got distracted with trying to create more elaborate tables on my blog here at Blogger. That opened a whole new can of worms as I tried new techniques for creating tables.

Going through my Bullet Journal, I have all kinds of ideas for future posts here on my blog.

I also need to complete my series about recently completed hikes here in Maricopa County.

As a result, I started creating new albums in my account over on Google Photos.

Unfortunately, there are only so many hours in a day.

\

Saturday, September 14, 2024

Creating Tables on Blogger...

Creating Tables in Blogger

As you may have noticed, when I create a table for my blog here at Blogger, I just use a very simple table that you can make using HTML.

It's a simple technique that does what I need it to do.

However, if you want to create tables with borders, different sizes, padding and spacing, and so on, apparently you need to use CSS (Cascading Style Sheets).

That's all well and good; however, I just cannot seem to get Blogger to let me use CSS to alter the characteristics of a table.

I am sure that there is a way to get Blogger to let do what I want to do when it comes to making a table.

I haven't found it.

While searching the help feature on Blogger, I found the instructions on how to use CSS to change the formatting of my blog.

For now, I am happy with the look of my blog.

New Technique for Creating Tables

Recently, I performed a search on Google, looking for a way to create more complex tables on Blogger.

One easy technique that I found was to create a table on a word processing application, such as Microsoft Word.

Once your table is complete, you then copy and paste the table into Blogger using the Compose View option.

Well, I tried that out. It worked.

To an extent.

Unfortunately, while in Compose View, you cannot alter the length of the cells in you table.

The obvious solution was to then go from the Compose View to the HTML View for my blog post.

Ideally, while in HTML View, you could, in theory, directly change the HTML code for your table.

Sounds all fine and good, right?

Well, it gets rather tricky.

When you look at the HTML code for the table you created using Microsoft Word or, in my case, Google Documents, Blogger will give you a huge mess of HTML code to go through in order to change the characteristics of the table.

I tried doing just that on my table.

It turned out to be a mess.

I even tried copying the HTML code from the HTML View in Blogger to Google Documents and then separating each line of HTML code.

After doing that, I was hoping to be able to locate what specific part of HTML code I needed to change to get the effect I desired on my new table, i.e., changing the width of the cells (or columns).

Again, something so simple turned out to be a mess.

In Conclusion

For now, I will just continue on with making simple tables for my blog here at Blogger.

It's simple and easy for the information that I am trying to convey.

It's not a problem.

I will keep on experimenting with directly changing the HTML code of the table in Google Documents. I am sure that is the correct technique, but it will take longer than five minutes to complete.

If my memory is correct, the issue I am having with altering the look of tables is an example about the limited functionality of Blogger itself.

Blogger was designed to be a simple way for someone to create a blog without any knowledge of HTML.

For now, that's all well and good. Blogger suits me just fine for what I want to do with my blog.

Perhaps later on I will consider making a change and start using a different blogging platform with more advanced features, such as WordPress or Squarespace.

We'll see...

UPDATE: I recently went over to the W3 Schools website and took another look at making tables in HTML. I copied the code for the basic table and pasted it into Blogger. When I went into Compose View, the table didn't show up. However, when I clicked on Preview, the table appeared exactly how it does on the W3 Schools website. That was a breakthrough. Thus, in order to make a table in Blogger, I will have to actually manipulate the code to create the table that I want. Got it.
Thursday, September 12, 2024

Starting Module 3 Network Security...

Starting Module 3 Network Security

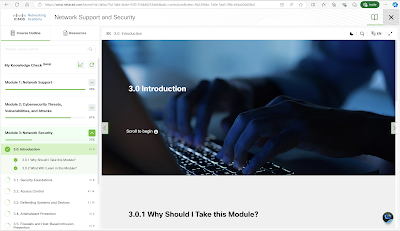
The other day, I FINALLY made it to "Module 3: Network Security" in the Network Support and Security online course from Cisco Networking Academy.

Boy, it was a long SLOG to get through "Module 2: Cybersecurity Threats, Vulnerabilites, and Attacks".

I will have more to write about this later.

Module 3: Network Security


Module Objective: Configure secure user access on a network.

Here are the objectives for Module 3:


Topic Title Topic Objective
Security Foundations Explain foundational security concepts.
Access Control Configure access control.
Defending Systems and Devices Explain cybersecurity processes and procedures that protect systems.
Antimalware Protection Explain methods of mitigating malware.
Firewalls and Host-Based Intrusion Prevention Explain how firewalls operate to filter traffic and recommend endpoint security measures.
Secure Wireless Access Configure basic wireless security on a home router (WPAx).

Sunday, September 8, 2024

Cybersecurity Threats, Vulnerabilities, and Attacks, Part 2...

Cybersecurity Threats, Vulnerabilities, and Attacks, Part 2

I haven't been posting a whole lot here on my blog.

I had completed two rather lengthy posts on my blog. It took a lot of effort to complete those two posts. There are additional lengthy posts in the pipeline.

Recently, I have been busy doing everything else except for posting to my blog.

One thing that I have been spending A LOT of time on is the Network Support and Security online class from Cisco Networking Academy.

For the past couple of weeks, I have been working my way through "Module 2: Cybersecurity Threats, Vulnerabilities, and Attacks". In fact, I wrote a post right here on my blog about beginning the second module of the Network Support and Security online class. You can read that post right here.

To say that my progress through the course has been slow is an understatement.

As I mentioned in a short post that I published on LinkedIn, I have already been exposed to a significant portion of the information about cybersecurity threats due to security briefings I had been given while in was in the Army, worked as a DoD contractor, and as an IT help desk employee at the Social Security Administration. However, it is a lot of information to absorb, so it is a good idea to review the nature of cyber attacks from time to time.

Module 2.0 Introduction

Module 2.1 Common Threats

Module 2.2 Deception

Module 2.3 Cyber Attacks

Module 2.4 Wireless and Mobile Device Attacks

I just started working on "Module 2.5 Application Attacks". It is the last section for Module 2:  Cybersecurity Threats, Vulnerabilities, and Attacks

Module 2.5 Application Attacks


Sunday, September 1, 2024

My Experience with a Pig Butchering Scam

Introduction

A few months ago, I was almost the victim of what is known as a pig butchering scam.

This will probably end up being a very lengthy post that will take some time to write.

Hopefully, my experience might be of use to someone.

Here is my rough outline for this post.

Moving Back to Arizona

New Membership on Plenty of Fish

Using What's App

What is Calculate BAT?

Christmas in San Francisco

The Hardsell

What is Pig Butchering?

In Conclusion

UPDATE: I REALLY need to work on this post. Now, I keep meeting people on Twitter/X that may or may not be a cryptocurrency scammer. On the other hand, after doing extensive research, I have concluded that there are legitimate ways to make money from investing in cryptocurrencies. For far too long, I let my experience with being the target of a pig butchering scam affect my opinion on cryptocurrencies. Still, there are cryptocurrency scammers out there that people should be aware of.

Tuesday, August 27, 2024

Cybersecurity Threats, Vulnerabilities, and Attacks

Module 2: Cybersecurity Threats, Vulnerabilities, and Attacks

OK. I F-I-N-A-L-L-Y made it through "Module 1: Network Support" to "Module 2: Cybersecurity Threats, Vulnerabilities, and Attacks" in the Network Support and Security online class available from the Cisco Networking Academy.

Boy, was it a LONG slog. However, "Module 1: Network Support" is complete. I scored a 93% on the 15 question end-of-module exam. I am now moving on to the next module in the class.

Module 2: Cybersecurity Threats, Vulnerabilities, and Attacks

Here are the Topic Titles and Topic Objectives for Module 2. 


Topic Title Topic Objective
Common Threats Explain the threats, vulnerabilities, and attacks that occur in the various domains.
Deception Describe the different deception methods used by attackers to deceive their victims.
Cyber Attacks Describe common types of network attacks.
Wireless and Mobile Device Attacks Describe common types of wireless and mobile device attacks.
Application Attacks Describe types of application attacks.

Cisco CyberOps Associate

After "Module 2: Cybersecurity Threats, Vulnerabilities, and Attacks", Module 3 covers the topic of network security. As a result, the last two modules of the Network Support and Security online class will have a cybersecurity emphasis.

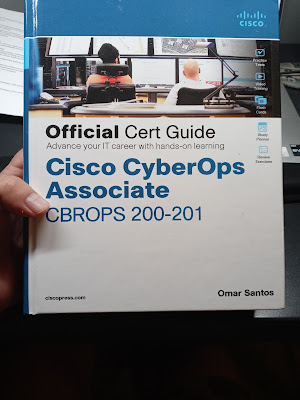
I recently bought a copy of official study guide for the Cisco CyberOps Associate (CBROPS 200-201) book published by Cisco Press over on Amazon.com. Thus, it will be interesting to see how much of an overlap there is between the online course and Cisco's entry-level cybersecurity certification.


Textbook for Cisco CyberOps Associate


Recently, I have considered putting aside studying for CCNA and focusing on the Cisco CyberOps Associate certification instead. After all, the Cisco CyberOps Associate certification only has one textbook compared to the two volumes needed to study for CCNA. Furthermore, I have a lot of regret about not earning my Security+ certification from CompTIA. After I earned my A+ certification, I should have just started studying for the Security+ certification in order to get me out of working at the Tier 1 IT help desk at the Social Security Administration (SSA). Earning that Security+ certification would have allowed me to work in the Security Operations Center (SOC) for SSA as a cybersecurity analyst. Instead of doing that, I got bogged down studying for the Network+ certification, which is CompTIA's version of CCNA. Why did I start studying for Network+ after A+? Well, the conventional wisdom is to study for Network+ after earning the A+ certification. After earning the Network+ certification, people will then typically study for Security+. The certification model is computer (A+) then network (Network+) then security (Security+). After figuratively banging my head against a brick wall while studying for Network+, I gave up and then started to study for CCNA instead. In hindsight, I should have skipped over networking altogether and focused exclusively on cybersecurity. That said, in order to defend networks from cyberattacks, it does kind of help to know how networks operate and do what they do.

Do I have regrets?

You better believe it.

Possible Change of Mission

Once I finish the Network Support and Security online course, I just MIGHT put aside studying for CCNA and focus on studying for the CyberOps Associate certification instead.The reason? The main reason is that I NEED an IT certification to put on my resume AS SOON AS POSSIBLE.

On the other hand, I just might be able to land an entry-level data center technician job somewhere in the Phoenix area with these badges I have earned from completing the online courses in networking from the Cisco Networking Academy.

We will just have to see what happens next.

Sunday, August 18, 2024

Setting Up the Sea Sucker Bike Rack...

Setting Up the Sea Sucker Bike Rack

In a previous post, I wrote about all of the problems that I have encountered with my Trek Hybrid 7.2 FX bike after my bike sat in the garage of my mom's house for a couple of years. I also wrote about taking my bike over to Southwest Bicycles in Peoria, AZ for maintenance. Furthermore, I also wrote about buying the Sea Sucker Talon rooftop bike rack from REI

This past Saturday, I F-I-N-A-L-L-Y got around to setting up the Sea Sucker Talon bike rack on my car.

After watering the plants in the backyard, sweeping off the patio, and cleaning out the garage at my mom's house, I went ahead and took the opportunity to set up the Sea Sucker Talon bike rack on the roof of my car. Since it was a H-O-T afternoon (115 degrees Fahrenheit) in the Sun City, AZ area, I was already sweating like crazy. Since I had nothing else planned for the afternoon, it was the perfect opportunity to set up the bike rack.

I had already completed most of the preparation work before mounting the bike rack to the roof of my car.

  • I had already watched a couple of videos on Sea Sucker's own website on how to set up the Talon bike rack.
  • I also sat down and actually read through the instructions.
  • Lastly, I had already tried mounting the front of my Trek Hybrid 7.2 FX bike on the Talon bike rack on the floor of my mom's garage.

With all of that work completed, it was now time to actually set up the Sea Sucker Talon bike rack on the roof of my car. I was motivated to set up the bike rack for two reasons. First, I am starting to get incredibly bored with using the elliptical trainer at the gym. Spending longer than 20 minutes on the elliptical trainer no longer appeals to me. I start to get incredibly BORED. Second, since my failed attempt at mounting my brand new rear tire to the bike frame ended in disaster back in May, my Trek Hybrid bike has been collecting dust in my mom's garage.

Thus, it was a now or never type of moment.

As the videos from Sea Sucker made clear, setting up the Talon bike was actually fairly easy to do.

Here are the steps that I followed to set up the Talon 1-Bike Rack:

  1. I securely mounted the the HUSKE QR Fork Mount onto the front rack body.
  2. I then wiped clean the area on the roof of my car where I was going to place the front rack body.
  3. I then removed the protective covers for the suction cups on the front rack body.
  4. While holding down the front rack body, I then pressed the pump for each suction cup repeatedly until the orange indicator band was no longer visible.
  5. I then inserted the skewer into the opening of the HUSKE QR Fork Mount with the QR Washer next to the Cam Lever.
  6. I then attached the Adjustment Nut to the skewer.
  7. I then removed the front tire from my bike.
  8. I then lifted my bike onto the roof of my car.
  9. I then mounted the front tire dropouts of my bike onto the skewer.
  10. I then tightened the Adjustment Nut on the skewer as tight as possible against the bike fork.
  11. I then loosened the Adjustment Nut until I was able to close the Cam Lever.
  12. After removing the the protective cover for the suction cup, I then placed the rear rack body under the rear tire of my bike.
  13. Again, I then pressed the pump for the suction cup until the orange indicator band was no longer visibile.
  14. I then wrapped the velcro strap to secure the tire to the rear rack body.
  15. To prevent the pedals from moving around during travel, I then used the orange velcro strap to secure the pedal to the bike frame.

Before I knew it, I had mounted my bike to the Sea Sucker Talon bike rack on the roof of my car. It was pretty easy.

The most difficult part of setting up the Talon bike rack was mounting the bike to the forward base.

My bike successfully mounted to the Sea Sucker bike rack.
My bike successfully mounted to the Sea Sucker bike rack. 

Close up of the suction cups used in the Sea Sucker bike rack.

The Sea Sucker Talon bike rack on the roof of my car.
The Sea Sucker Talon bike rack on the roof of my car. 

Rear view of the Sea Sucker Talon bike rack.
Rear view of the Sea Sucker Talon bike rack. 

I then started my car and cautiously left the parking lot at my mom's house. I then drove around the neighborhood for a little bit. My bike appeared to be securely mounted to the Sea Sucker bike rack. Additionally, the Sea Sucker bike rack appeared to be securely mounted to the roof of my car. I then decided to drive over to Southwest Bicycles in nearby Peoria, AZ. Despite all of the potholes and bumps in the road, I managed to drive my car to the parking lot for Southwest Bicycles without incident. It was an easy task to remove my bike from the Talon bike rack, so I could remount the front tire. Removing the front and rear racks was easy. I just pressed the rubber tab for each suction cup. I then removed both racks and placed them into my trunk for storage. An important point to remember is that the Sea Sucker bike rack is not secure. There is no way to lock the Sea Sucker Talon bike rack to prevent someone from stealing it. 


Arriving at the parking lot for Southwest Bicycles in Peoria, AZ.

In Conclusion

Thus far, I have been impressed with the Talon bike rack from Sea Sucker. This particular bike rack saved me from having to spend several hundreds of dollars on a roof rack for my car. Eventually, I would like to use the Talon bike rack to take my bike down to, say, downtown Phoenix for a bike ride. We'll see if it passes that test.